Help Center
In this article
Lead Engagement
0 out of 5 stars
| 5 Stars | 0% | |
| 4 Stars | 0% | |
| 3 Stars | 0% | |
| 2 Stars | 0% | |
| 1 Stars | 0% |
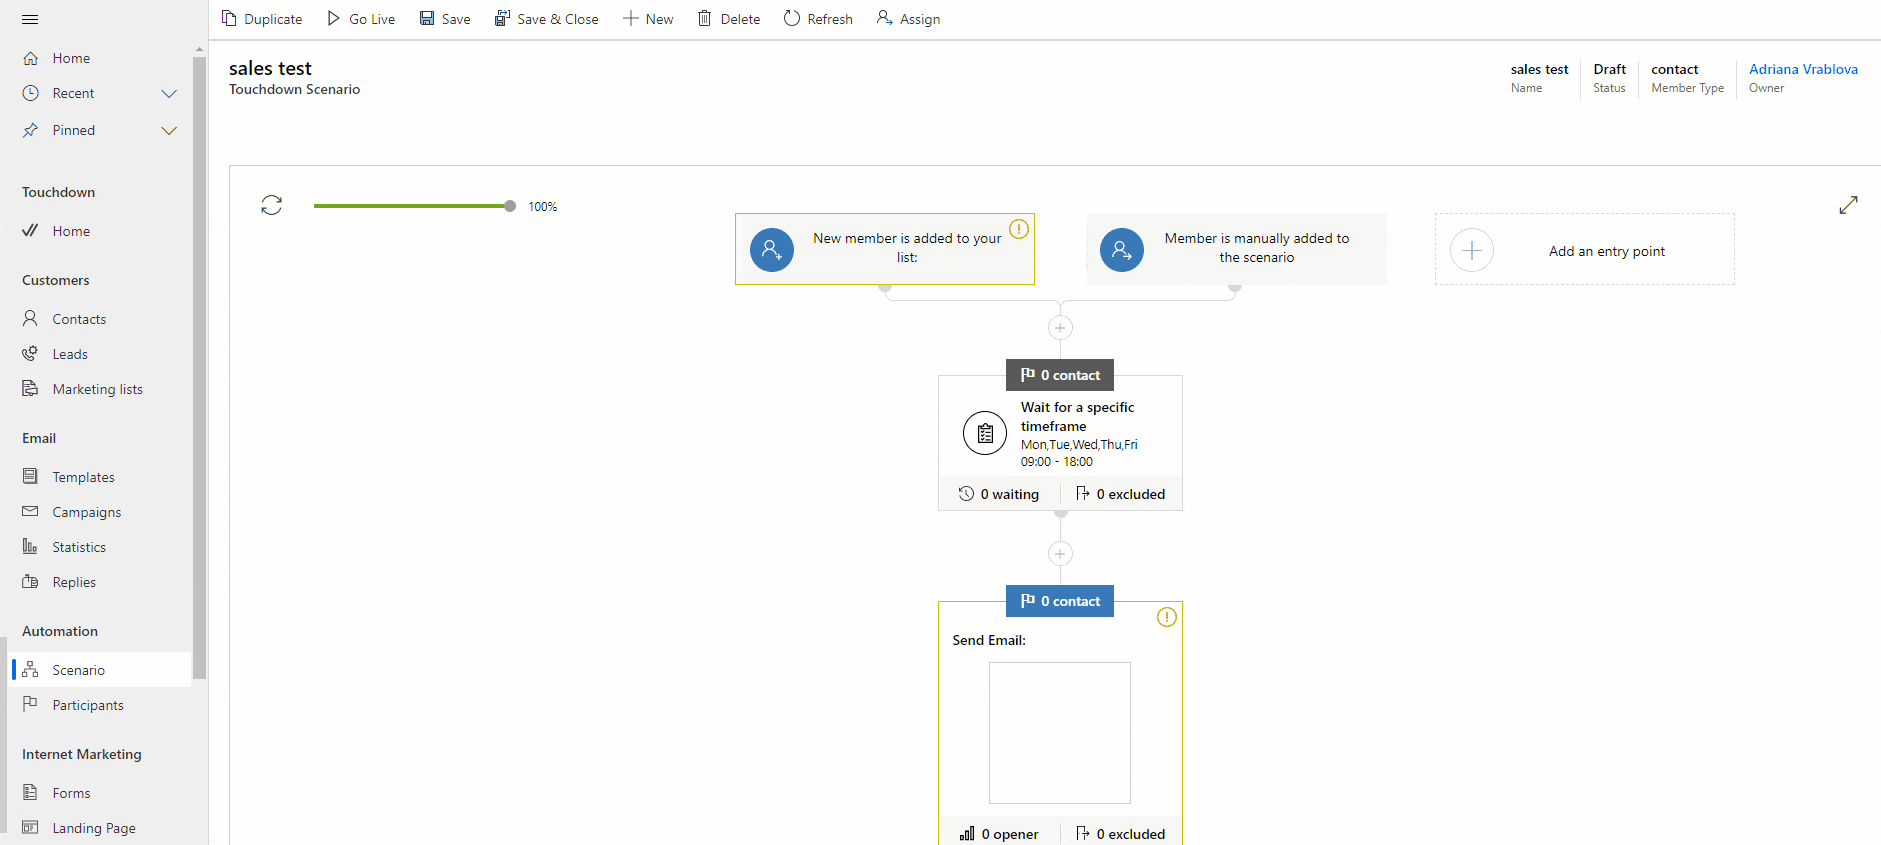
You can start engaging your leads using automation. Touchdown includes a Sales engagement template with predefined actions including entry point, triggers and actions to optimise your sales engagement process.
To create a Sales engagement scenario using the template:
- Go to Scenario in the Touchdown menu
- Create a new scenario by clicking +New in the top bar
- Enter the name of the automated scenario
- Select Sales Engagement template
The template includes predefined steps, you can adapt to your case in the following order:
Starting point
- To start engaging your leads in the scenario, click New member is added to your list
- Select an existing marketing list – for more information about how to create a marketing list, view this article
- Confirm OK
Trigger
- The predefined step tells the automation when it can send the emails, click Wait for a specific time frame
- Your emails will only be sent during these specific days and hours, the predefined interval is Monday through Friday between 9 and 18:00, to modify:
- Click on the days of the week for the email sent
- Set the time period your emails can be sent by clicking on the clock
- Select the timezone for the time intervals
- Confirm OK
Email creation
- This step tells the automation to send the email according to the respected time interval from the previous step.
- To add an email, click on the square under Send Email
- Prepare your email – for more information about how to create an email in automation, view this article
- Confirm OK
Triggers
- Your lead has received the email that means now wait to see if the lead will interact with the email by replying
- Click Wait for interaction
- If you want to modify, select another type of interaction
- Click Day(s) to select how much time your leads have to interact with the email in days or hours
- Click the number to select how many days or hours your leads have to interact with your email
- Confirm OK
The scenario is now divided for two cases:
- Your lead interacts:
- In this case, they pass onto a manual resume
- If they reply to your email, you will find the reply in Replies – view this article for more information about replies
- You can manually add the leads into the scenario if according to you there still might be an interest
- Your lead doesn’t interact:
- In this case, you should wait before sending another email using Timer step
- Click Timer step
- Click the number to define the waiting period for the email send
- Confirm OK
- The automation will again wait for the appropriate time and date for the email send using Wait for a specific time frame trigger you can adapt
End of the scenario
- When your lead is converted into a customer or is qualified as not interested, for example, they should leave this scenario
- Click Remove member from list
- Select the marketing list you want them to leave
- Confirm OK
- When you are finished, you can publish the scenario by clicking Go Live in the top bar.
If your email sequence requires several email sequences, you can simply reproduce the automation steps described above. If you wish to explore more options, this article explains automation actions, triggers and conditions you can apply to adapt the scenario to your case.
Was this article helpful?
0 out of 5 stars
| 5 Stars | 0% | |
| 4 Stars | 0% | |
| 3 Stars | 0% | |
| 2 Stars | 0% | |
| 1 Stars | 0% |